
- Category: Roof Repair and Maintenance
Table of contents
Understanding Common Whirlybird Issues and Their Causes
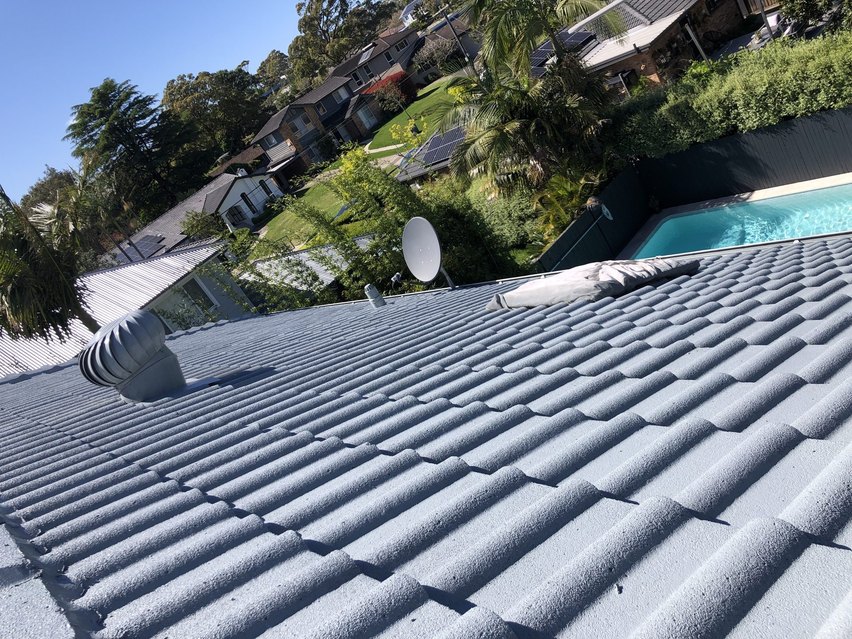
Whirlybirds, those spinning roof ventilators that provide a low-cost solution for reducing heat in attics and improving home ventilation, are ubiquitous in homes across various regions. However, despite their simplicity and efficacy, whirlybirds are not immune to issues that can impede their performance and longevity. Understanding the common problems and their root causes is essential for maintaining their efficiency and ensuring a long service life.
Blocked or Damaged Bearings: One of the most frequent issues with whirlybirds is the blockage or damage to their bearings. These bearings enable the smooth rotation of the whirlybird, but over time, they can become blocked with dust, dirt, or rust. Exposure to the elements, especially in coastal areas where salt is present in the air, can further exacerbate this problem, leading to a whirlybird that either turns with difficulty or ceases to turn altogether.
Wear and Tear from Weather: Another common issue is the general wear and tear from exposure to harsh weather conditions. Whirlybirds are designed to withstand a lot, but extreme weather, including high winds, heavy rain, and hail, can cause physical damage. Dents from hail or debris can alter the shape and balance of the whirlybird, reducing its efficiency and potentially causing it to become noisy during operation. Additionally, prolonged exposure to sunlight can weaken the materials over time, leading to cracks and leaks.
Improper Installation: Finally, improper installation can lead to a host of problems down the line. If a whirlybird is not correctly aligned or securely fastened, it can result in excessive vibration, noise, and even detachment from the roof under extreme conditions. Ensuring that whirlybirds are properly installed by professionals is critical to avoiding these issues and optimising their performance.
Step-by-Step Guide to Diagnosing Your Whirlybird Problem
One of the common issues that homeowners face with their roofing systems is a malfunctioning whirlybird. Whirlybirds are essential for ventilating your roof and keeping the temperature within your attic manageable. However, when they stop working correctly, it can lead to bigger problems, such as increased moisture, which in turn can cause mould and mildew. Here’s a practical step-by-step guide to pinpoint what might be going wrong with your whirlybird.
1. Check for Obvious Obstructions
The first step in diagnosing your whirlybird problem is to visually inspect the unit for any obvious debris or objects blocking its movement. Over time, leaves, twigs, and even birds’ nests can obstruct the blades of a whirlybird, preventing it from spinning. Carefully removing any obstruction can quickly solve your problem without the need for further intervention.
2. Listen for Unusual Noises
Once any visible blockages are cleared, it’s important to listen to your whirlybird while it’s spinning. Squeaking or grinding noises can indicate that the bearings or the central spindle may be worn out or in need of lubrication. Applying a suitable lubricant can often resolve noise issues, but if the problem persists, it could signify that parts need replacement.
3. Assess the Spin
Finally, checking how smoothly your whirlybird spins is crucial. A well-functioning whirlybird should spin with minimal effort and maintain a consistent rotation speed in adequate wind. If your whirlybird is struggling to spin or spins unevenly, it might be due to bent blades or a misaligned mount. Sometimes, a simple adjustment can fix this, but in more severe cases, a part, or even the entire whirlybird, may need to be replaced.
DIY Fixes for the Most Common Whirlybird Issues
When it comes to maintaining your roof’s whirlybird, encountering some issues is almost inevitable. These ceiling-mounted ventilators are crucial for reducing heat and moisture in your attic but can be a source of annoyance when they start to malfunction. Fortunately, many common whirlybird problems can be solved with a little DIY know-how. Here, we’ll guide you through some easy fixes to the most frequent issues homeowners face with their whirlybirds.
Fixing a Noisy Whirlybird
Noise is a common complaint among whirlybird users. The cause is usually a lack of lubrication on the moving parts or debris caught within the unit. Start by carefully cleaning out any leaves, twigs, or dirt that might be obstructing the ventilator’s rotation. Next, apply a liberal amount of light, all-purpose machine oil to the pivot points and bearings. Often, this simple maintenance step can significantly reduce or completely eliminate the noise.
Improving Whirlybird Efficiency
If your whirlybird seems less effective at venting heat or moisture, it might be due to improper installation or blockages in your attic’s vents. Ensure that your attic venting is clear, allowing for optimal airflow. Check the whirlybird for any signs of damage or wear, such as bent blades which can hinder performance. Adjusting the tension of the turbine can also help; refer to the manufacturer’s guide for specifics. Remember, maintaining clear pathways for air in and out of your attic is key to whirlybird efficiency.
Addressing Leakage Issues
Leaks around the base of a whirlybird can lead to significant water damage if not addressed promptly. Inspect the sealant around the bottom of the unit; over time, it can crack or wear away. Applying a fresh bead of high-quality roof sealant around the base can stop leaks and prevent future water intrusion. It’s important to choose a sealant that is compatible with your roof material and check the weather forecast to ensure it cures properly, avoiding any rain until the sealant is fully set.
When to Call a Professional for Your Whirlybird Repairs
Sure! Here’s a crafted SEO content piece focusing on when to engage a professional for Whirlybird repairs:
Identifying the right time to call in a professional for your Whirlybird repairs is crucial to ensure your roofing system continues to function effectively. Whirlybirds, while robust, are not immune to damage from harsh weather, wear and tear over time, or improper installation. Understanding the signs that indicate the need for a professional repair can save you from costly damages in the long run. One clear indicator that it’s time to consult a professional is when you notice any unusual noises coming from your Whirlybird. This could include squeaking, rattling, or any sounds of friction that were not present before. Such noises often suggest that the bearings are failing or there is a misalignment, issues that require expertise for proper diagnosis and repair. Another tell-tale sign is a notable decrease in efficiency. If your attic is hotter than usual or you’re experiencing moisture problems that your Whirlybird used to handle with ease, its performance may be compromised. Visible damage or rust on the external parts of your Whirlybird also warrants a call to the professionals. Damage can include anything from dents and scratches to severe rusting, which can impair the Whirlybird’s ability to ventilate properly. Similarly, if your Whirlybird has been directly impacted by severe weather events such as hailstorms or high winds, a thorough inspection by a roofing specialist is advisable to ensure its integrity and functionality are not compromised.
In conclusion, timely intervention by experienced professionals is key to extending the life and efficiency of your Whirlybird. Whether it’s unexplained noises, decreased efficiency, visible damage, or after a severe weather event, don’t hesitate to reach out to a roofing expert. Proactive measures not only ensure your Whirlybird operates at its best but also safeguard the overall well-being of your roofing system.
Maintaining Your Whirlybird: Prevent Future Issues
Maintaining your whirlybird is crucial for ensuring its efficiency and longevity. As these devices are constantly exposed to various weather conditions, regular maintenance can prevent a myriad of future issues that might otherwise compromise your roofing system. Understanding the steps involved in keeping your whirlybird in top condition is essential for any homeowner.
First and foremost, it’s important to conduct regular inspections of your whirlybird. Ideally, this should be done at least twice a year. Look for any signs of wear and tear, such as rust or damage to the moving parts. These inspections are best performed before and after the most severe weather seasons. Keeping the area around the whirlybird clear of debris (e.g. Leaves, branches, and dirt) is equally important to ensure it can rotate freely, which is critical for its operation.
Cleaning and Lubrication
Cleaning is another important aspect of whirlybird maintenance. Dust, dirt, and other particles can accumulate over time, which may hinder the device’s ability to spin and ventilate your space effectively. Use a soft brush or cloth to gently remove any debris from the vent. Additionally, proper lubrication of the moving parts is essential for smooth operation and to prevent rust. Using a silicone-based lubricant is recommended, as it won’t degrade under high temperatures or attract dirt.
Lastly, paying attention to any unusual noises or decreased efficiency can help catch potential issues early. A fully functional whirlybird should operate quietly and efficiently. If it becomes noisy or seems to be underperforming, it may be indicative of a problem that requires further investigation. Addressing these signs early can save you from costly repairs or replacements down the line. Engaging a professional roofing company, like Gold Coast Local Roofers, for regular maintenance or any repair work ensures your whirlybird remains in optimal condition, safeguarding your home against ventilation issues.